Style your Terminal & IDEs
个性化你的终端以及IDE
Style your Terminal
In this article, I will show you how to style your terminal and IDEs.
We will use iTerm2 as the terminal and Oh My Zsh as the shell.
Step 1: Install iTerm2 and configure it
Download iTerm2: https://iterm2.com/
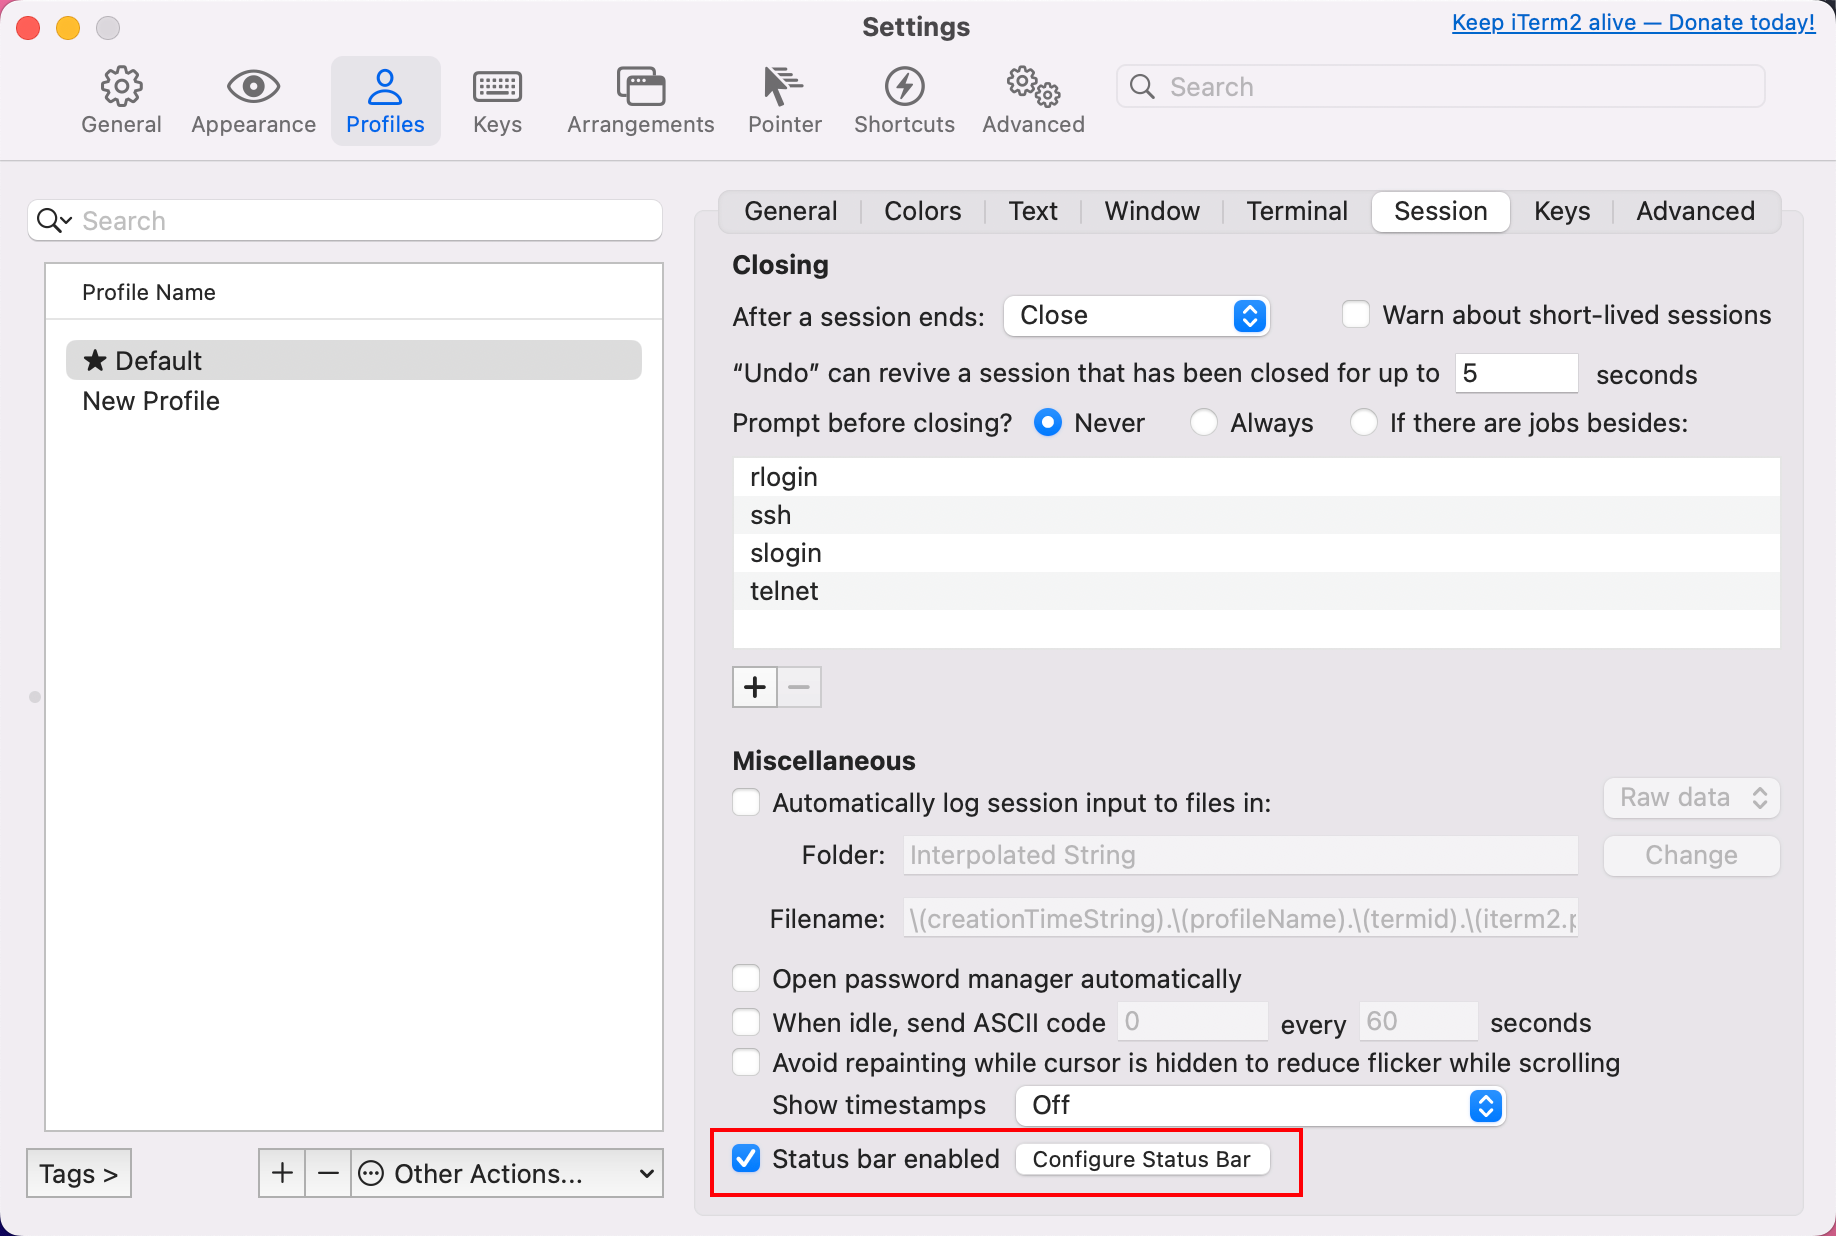
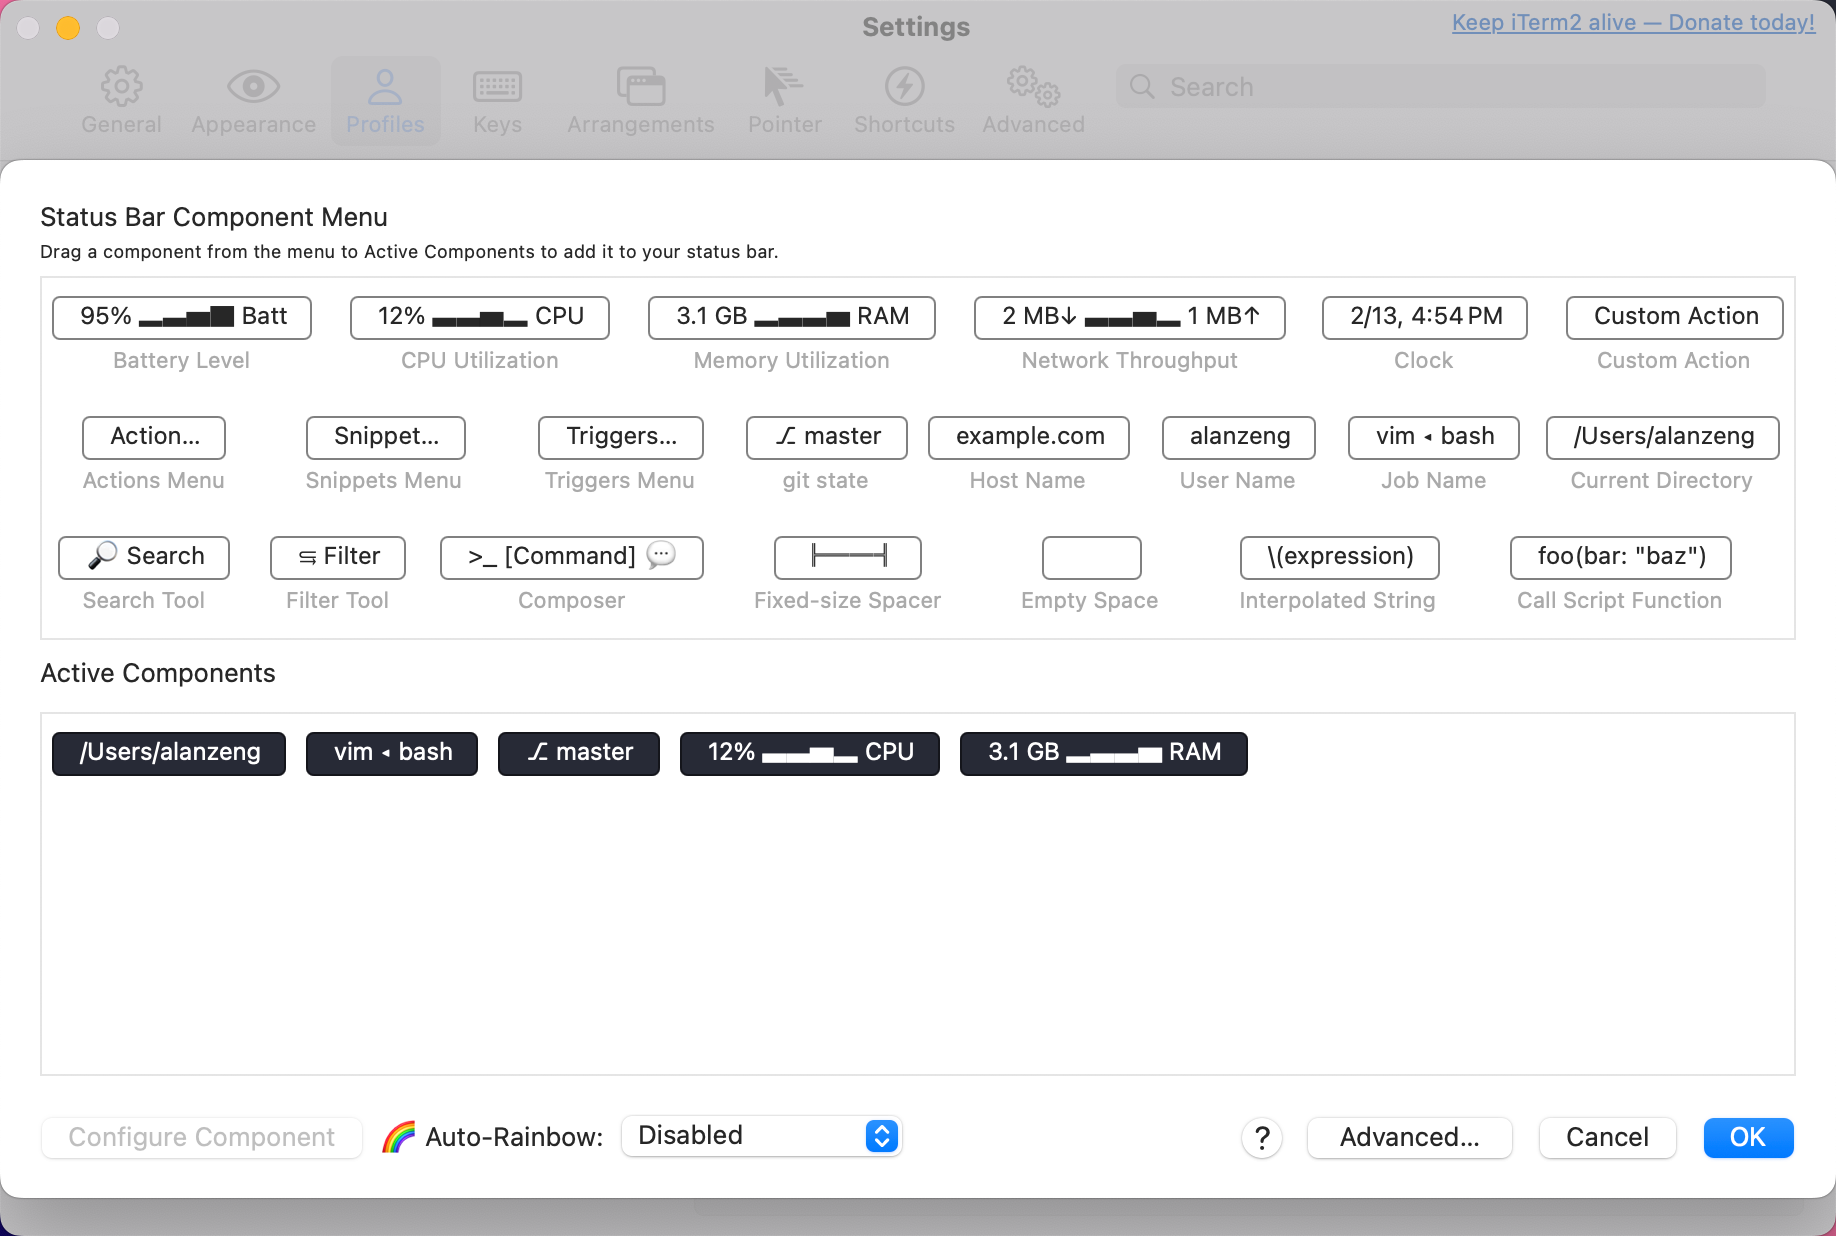
Adjust Status Bar
Change Color Scheme
Dracula: https://draculatheme.com/iterm
Preferences-Profiles-Color-Color > Presets-Import

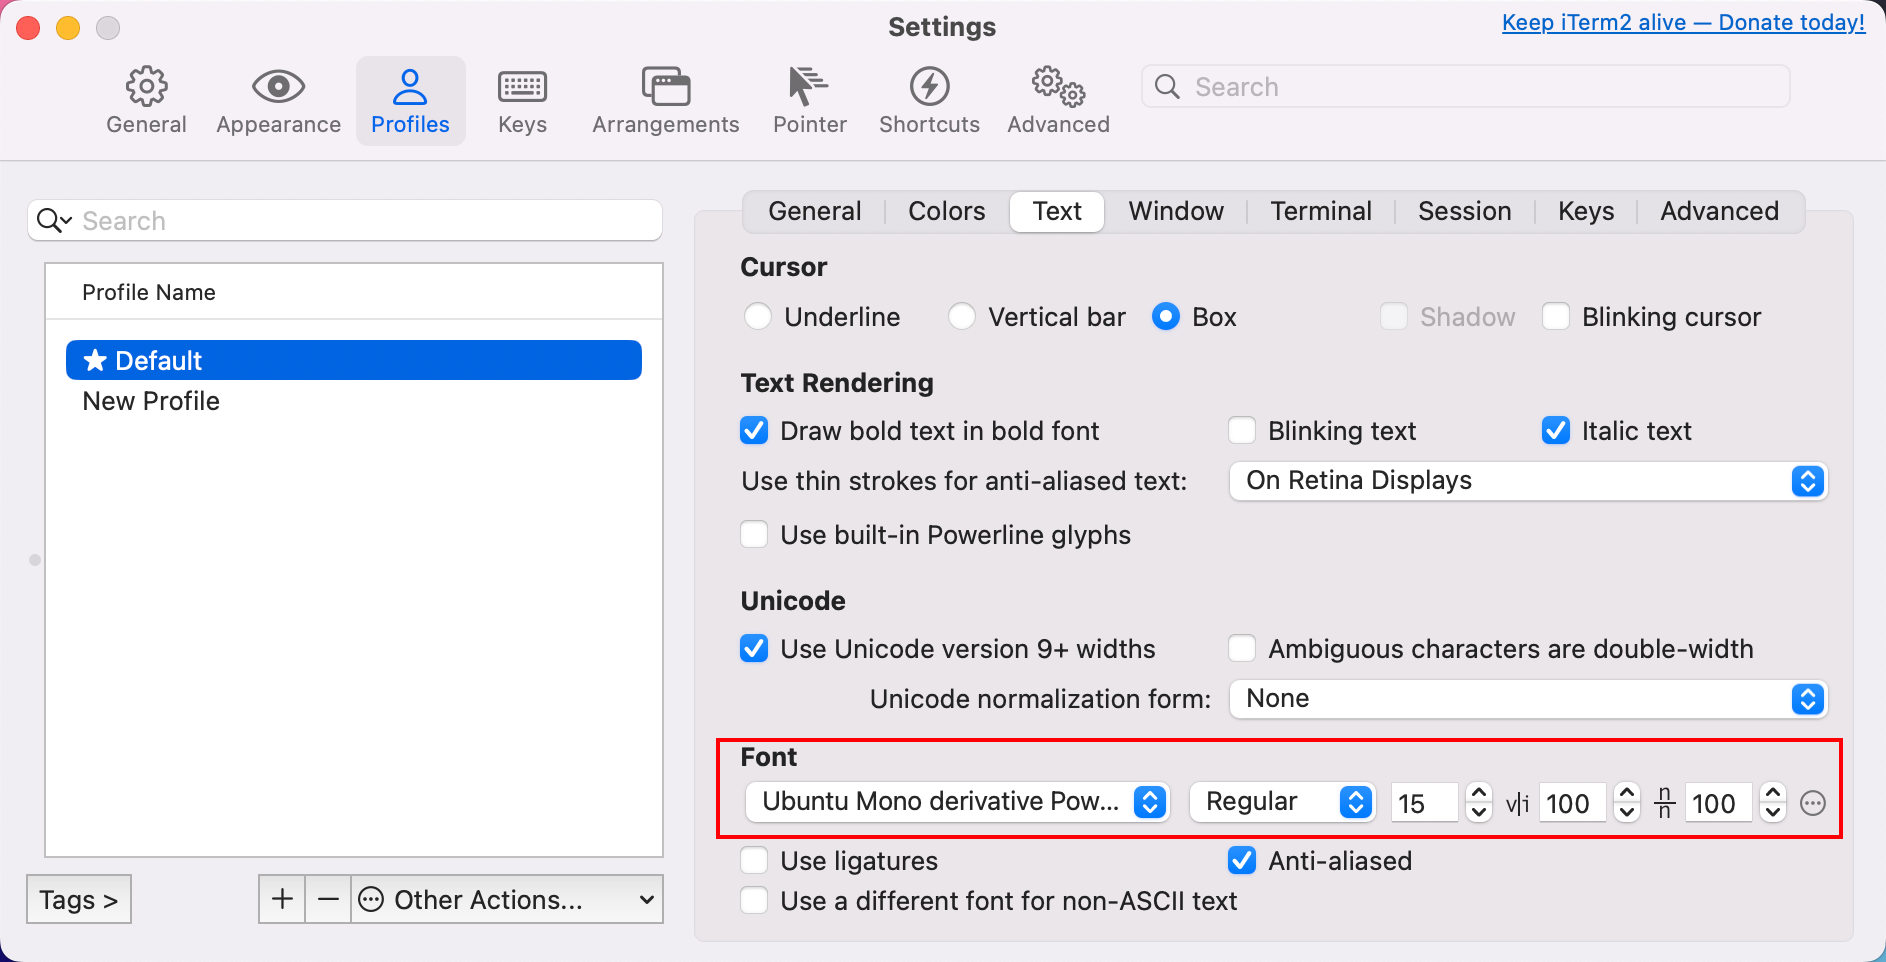
Change Font
Download Nerd Fonts: https://www.nerdfonts.com/font-downloads
Download Powerline Fonts: https://github.com/powerline/fonts
1
2
3
4
5
6
7
8clone
git clone https://github.com/powerline/fonts.git --depth=1
install
cd fonts
./install.sh
clean-up a bit
cd ..
rm -rf fontsChange Font
Step 2: Install Homebrew
- Install Homebrew: https://brew.sh/
Step 3: Install Oh My Zsh
- Install Oh My Zsh: https://ohmyz.sh/
Step 4: Install Plugins
- zsh-autosuggestions: https://github.com/zsh-users/zsh-autosuggestions
- use Homebrew to install
1
bew install zsh-autosuggestions
- use Homebrew to install
- zsh-syntax-highlighting: https://github.com/zsh-users/zsh-syntax-highlighting
- use Homebrew to install
1
brew install zsh-syntax-highlighting
- use Homebrew to install
- auto-jump: [https://github.com/wting/autojump]
- use Homebrew to install
1
brew install autojump
- use Homebrew to install
- neo-fetch: https://github.com/dylanaraps/neofetch
- Use Homebrew to install
1
brew install neofetch
After the brew installation there will be a prompt output, follow the prompt to configure it:
- Use Homebrew to install
Here is my .zshrc configuration:
1 | # If you come from bash you might have to change your $PATH. |
ref:
- https://www.nerdfonts.com/font-downloads
- https://flyeric.top/archives/iterm2-with-ai
- https://draculatheme.com/iterm
- https://sspai.com/post/63241
Style your IDEs
Material Theme: https://material-theme.site/
Fonts:
—– Not Finished —–
文章作者: Alan Zeng
最后更新:
原始链接: https://alanzeng.com/blogs/25211/
版权说明: 本博客所有文章除特别声明外,均采用 BY-NC-SA 4.0许可协议 。获得许可后,要求转载时注明文章出处和网站链接,谢谢!